Organizing Users into Teams
When you organize Mortgage Quest users into teams, a user can view their individual data or all team members data. The Access to All Team Users option gives a person access to all team members data. Also, a Mortgage Quest user can be a member of more than one team. For example, a processor can be a member of two different teams. When the processor logs onto Mortgage Quest they can select which teams data to view.
To Set Up a Team:
A user must have System Administrator privileges to set up a team.
1. Click the  icon to display the register screen.
2. Click Team Manager to display the Team Manager screen.
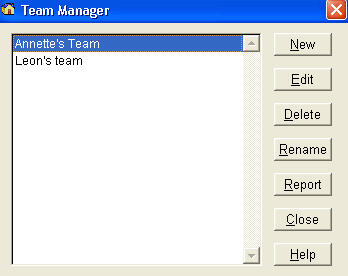
The Team Manager has the following features:
· New Create a new team.
· Edit Add or remove users from the team.
· Delete Delete a team.
· Rename Rename a team.
· Report List the users of a team.
1. Click New to create a new team.
2. Select a Mortgage Quest user from the left list and click Add.
3. If you want a user to be able to view all team members data, add the user to the Team List and then click Set View.
4. Click Close and enter a unique team name. Before you can close, one or more users must be set to View All team members data.
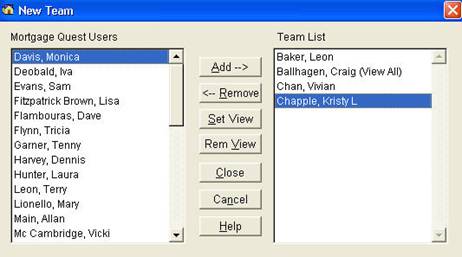
The team creator screen has the following features:
· Add Add a user to the team.
· Remove Remove a user from the team.
· Set View Give a team member the privilege to view all other team members data.
· Rem View Remove a team members privilege to the view all team members data.
· Close Close and save changes.
· Cancel Close and dont save changes.