Adding Images to E-Mail
In order to add images to Mortgage Quest e-mail letters, you must first upload the images to the Market Focus Image website and then insert links into the Word document that reference those images. When a person receives the e-mail, the images will appear in the e-mail.
To upload images:
1. Select Tools \ Image Manager.
2. The screen below displays.
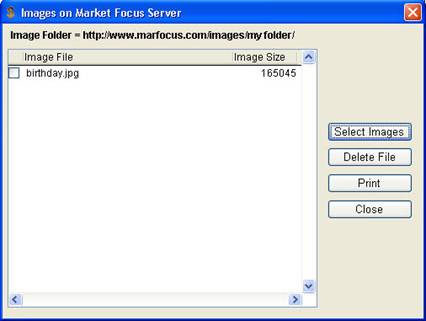
The Image Manager screen has the following features:
· Image Folder The first time you select images, Mortgage Quest asks you to name the folder on the image website. Enter a name that is short and easy to remember because you will be referencing this folder name in Word documents. At the top of the screen shows the full path of the image folder.
· Select Images Click Select Images to select and upload images to your image folder. Select a folder on your local computer that contains the image files to be uploaded, such as My Documents. All JPG images found in the selected folder is displayed.
· Image File Requirements
· File size must be under 300,000 bytes.
· File names should be short, meaningful, and should not contain any special characters. For example, you might have an image of a sales chart named sc#32322.jpg. Rename this to what the image represents, such as saleschart.jpg. It will be much easier to reference this image with a shortened name. And special characters can cause errors when the file is referenced.
· Only JPG file types can up loaded. This is the best image type for e-mail.
· The total amount of space on the image website is limited to 5MB per system. You should delete images that are no longer used so you can keep below this limit.
· Print Print a list of all graphic files uploaded to the image website. This is useful when inserting them into Word documents.