Creating and Managing Outlook Appointments
There are multiple ways to create Outlook appointments from Mortgage Quest. You can create linked and unlinked appointments. A linked appointment associates the appointment with a particular Mortgage Quest borrower or contact. This allows you to see a history of appointments from the Mortgage Quest record. You also can view, edit or delete linked appointments from Mortgage Quest.
When you create an unlinked appointment from Mortgage Quest, the appointment is created in the Outlook calendar but it is not linked to any particular person. You must manage unlinked appointments from Outlook.
The Outlook Activities screen displays all linked and unlinked Outlook appointments. You can create and edit all appointments through the Outlook Activities screen. See the section on Displaying Outlook Activities for a description of how to add and edit appointments.
To create a linked appointment with a person in Mortgage Quest:
1. Go to the Mortgage Quest record.
2. Select Activities / Create Outlook Appointment / Link to Person
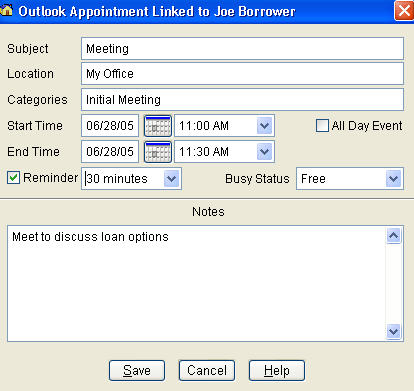
3. Enter the appropriate information in the screen below.
4. Click Save to create the appointment in the Outlook calendar. The appointment title and start date displays in the Mortgage Quest record.
Note: You can create an appointment by right clicking the mouse button and selecting Activities / Create Outlook Appointment / Link to person. You can also click New on the persons Notes screen.
To edit a linked appointment:
1. Go to the Mortgage Quest record and click the Notes tab.
2. Select the appointment to edit from the list and click Edit
3. Mortgage Quest reads the appointment information from Outlook and displays the screen below.
4. Make any changes needed and click Save. Mortgage Quest updates the appointment information in Outlook.