In Touch Today Set Up
Before you can order In Touch Todays products and services, you need to enable the service in Mortgage Quest, add money to your account and choose In Touch Today graphic options for postcards and greeting cards. If you are using the Multi-User Enterprise version of Mortgage Quest, youll also need to indicate which users have permission to order products and services.
To enable In Touch Today Services:
1. Start Mortgage Quest.
2. Select Services / In Touch Today / Enable Service.
To select In Touch Today graphic options:
The primary tasks that need to be completed in Mortgage Quest involve making sure that each registered loan officers information is complete and accurate, deciding on the postcard format and selecting the appropriate graphic files for your photo, company logo and signature.
1. Start Mortgage Quest.
2. Click the Register  icon to view the register screen.
For each registered loan officer, make sure all the information is complete and
accurate. The required fields will appear on the postcard:
icon to view the register screen.
For each registered loan officer, make sure all the information is complete and
accurate. The required fields will appear on the postcard:
· Loan Officer Title
· Company Name
· Company Address
· Email Address
· Work Phone
· Work Fax
3. If you are using a multi-user version of Mortgage Quest, you need to indicate who will have permission to order products and services. This is not required for the single version. Do the following for each Mortgage Quest user that you will allow to order products and services. You must have administrator privileges to enable this option.
a) Select the Mortgage Quest user from the drop down list and click User Options.
b) Mark the Order Products and Services option and click OK.
4. Click ITT Setup to display In Touch Today Set Up screen. The screen below presents the selected loan officers information, such as name, title, fax, office and email address. The company address is also displayed. It is very important that this information is complete and accurate.
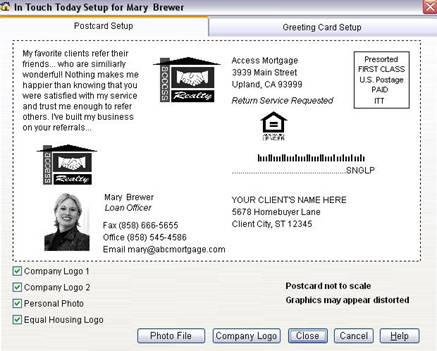
The Postcard Setup tab has the following options.
Note: Your company logo can be placed in two locations on the postcard. Also, if you do not want your company logo or picture on the postcard, be sure to unmark the checkboxes next to each option.
· Company Logo 1 When marked, your company logo will appear at the top of the postcard, next to the company address. Unmark the checkbox to remove this option.
· Company Logo 2 When marked, your company logo will appear above your name. Unmark the checkbox, to remove this option.
· Personal Photo When marked, the selected personal photo will appear on the postcard. Unmark the checkbox to remove this option.
· Equal Housing Logo When marked, the equal housing logo will appear on all postcards, just below the company return address.
· Photo File If the Personal Photo option is marked, click Photo File and select the TIF that contains the loan officers photo. The graphic must be black and white, and the dimensions must be no smaller than 600 by 600 pixels, or 300 DPI. (2x 2)
· Company Logo If the Company Logo 1 or Company Logo 2 option is marked, click Company Logo and select the TIF file that contains your company logo. The graphic must be black and white, and the dimensions must be no smaller than 600 by 600 pixels, or 300 DPI. (2x 2)
5. Click the Greeting Card Setup Tab if you plan to order In Touch Today greeting and birthday card campaigns. All card campaigns require a signature file.
6. When you are finished selecting setup options, click Close.
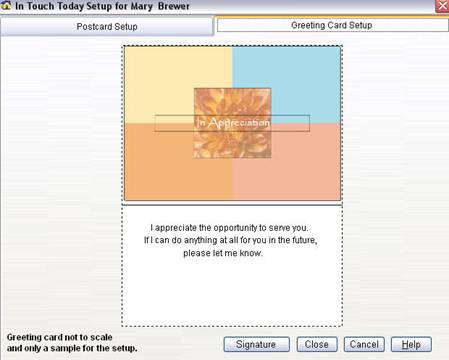
The Greeting Card Setup screen has the following options:
· Signature Click Signature and select the TIF file that contains the loan officers signature. The graphic must be black and white, and the dimensions must be exactly 1200 by 300 pixels, or 300 DPI. (4x 1)
Set Order Products and Services Permission (Optional)
If you are using the Multi-User Enterprise version of Mortgage Quest, do the following to give individual users permission to order products and services:
1. Select the user from the user list on the registration screen.
2. Click User Options.
3. Mark Order Products and Services checkbox to allow this user to order products and services. If the checkbox is unmarked, this person cannot order.
4. Click OK.
5. Repeat the steps above for each user.