Displaying All Outlook Activities
All Outlook tasks and appointments can be displayed on the Outlook Activities screen. The Outlook Activities is available in both the Borrowers and Contacts databases and displays the exact information.
When you create tasks and appointments from Mortgage Quest, the Outlook Activities screen is updated. If you create tasks and appointments in Outlook, you need to refresh the Outlook Activities screen in Mortgage Quest.
To refresh the Outlook Activities screen:
1. Click  on the toolbar and mark Read Outlook Appointments
and Read Outlook Tasks.
on the toolbar and mark Read Outlook Appointments
and Read Outlook Tasks.
2. All Outlook tasks and appointment will be read and shown in the list based on the view options selected.
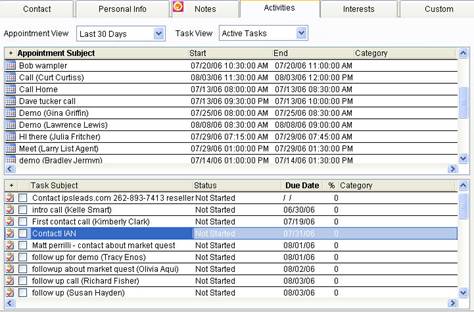
You can add, edit and delete Outlook appointments and tasks from this screen. You can also change the view to display appointments for a certain time period and tasks based on the task status.
Outlook Activities Features
· Maximize/Minimize Screen Click + to maximize the appointments or tasks list. Click - to minimize the list.
· Double Click (To Edit) Double click on an appointment or task to display an edit screen. Changes are saved in Outlook.
· Change Sort Order Click on a column title (e.g., Category) to change the sort order for displaying appointments and tasks.
· Right Mouse ( To Display Menu) Click the right mouse button on the appointments or tasks list and a menu displays so you can create, edit, or delete an item. If you linked an appointment or task to a borrower or contact record, select Go To Linked Record to display the persons record.
· Drag and Drop (To Add) When the Borrower or Contact Records list is displayed, you can select a person from the list and drag them to the appointments or tasks list to create a linked item. Hold the left mouse button down on a persons name and move the mouse directly over the appointments or tasks list, and then release the mouse button.
· Complete Tasks To mark a task completed, click the checkbox next to the task item. The item in Outlook will also be marked complete.
· Appointment View Select a time period (Today, or next 7 days) from the Appointment View list. The appointment start date is used to select appointments to view.
· Task View The task status is used to change the list of tasks displayed. You can also select Overdue tasks, which is based on the tasks due date.